Showing posts with label Food. Show all posts

Sunday, February 1, 2015

A Game of Thrones Party, Part 2- The Food & Drink


Hello again, friends and fellow Game of Thrones fans. This post is a follow up to my previous post about our Game of Thrones party, featuring the theme details, decor and temporary tattoo craft from my 30th nameday - er - birthday.

While the decor was fun and gave me a chance to fulfill the craftiness I was craving, you surely know by now that menu planning is my absolute favorite part of any gathering. Planning this menu was a challenge, as this group could vary from 25-45 people, taking 'maybe' RSVP numbers into account. It ultimately ended up being about 40 people throughout the day, so thank goodness I planned ahead!


Game of Thrones Party | NobleHostess.com

This table also had to be thematically appropriate (I was picturing a hedonistic Lannister spread), and presented in a way that kept with the general house sigil / loose medieval feel of the party. If some of the dishes could tie into book themes, all the better!

As with the first post, the amazing photographer (and friend) Alexander Wysocki was kind enough to take photos for me to use in this post. So let's take a food tour through our Westerosi-inspired spread!

For the main munchables, we are lucky to be close to the much-beloved Porto's bakery, which offers catering at dizzyingly reasonable rate. We got several dozen meat pies as well as several dozen vegetarian-friendy spinach-and-cheese pies, a savory treat we think they would happily indulge in in Westeros.

Wednesday, August 27, 2014

Homemade H-100's (aka: Best Tater Tots Ever) with Garlic Aioli

Sunday Brunch: H-100's (Tater Tots) with Garlic Aioli

I love making brunch. It is a great reason to get up early and jump right into the kitchen, setting to work making universally loved dishes (looking at you, bacon). It is also, really, the most convenient time to have friends over - you get the morning to cook and clean pre-party (read: shove all of your unfolded laundry into the closet) and the evening to clean up post-party (read: declare that you now will finally fold aforementioned laundry, but really just eat leftovers).

So, what are some elements of brunch that makes the meal so dang appealing? Some options:
  1. It feels luxurious. Saying you are "brunching" feels deliciously upper-crust.
  2. If you are combining breakfast and lunch, you have every excuse to eat two meals' worth of food.
  3. Drinking in the morning. Just sayin', mimosas are amazing.
  4. You have a loose framework to follow - unlike a dinner party where you feel the need to 'wow' with new, clever dishes, everyone has a general idea of what to expect for brunch. There will probably be eggs, some form of bread/pastry and, God willing, pork breakfast meat.
  5. Despite said expectations, it is super fun to play with breakfast food conventions to create something special. Love breakfast burritos? Make breakfast tacos! Minds will be blown!
  6. It is super easy to make vegetarian options for non-meat-eating friends.
  7. It is inexpensive. Flour and eggs will likely be the bulk of your ingredients, and it's hard to get much cheaper.
  8. What you don't eat can often be frozen and re-heated for future brunches. Baked goods such as muffins, biscuits and scones are fantastic for this, and, SPOILERS, potato dishes...

Sunday Brunch: H-100's (Tater Tots) with Garlic Aioli
Gratuitous bacon shot. Delicious with H-100's (and everything).

In anticipation of this upcoming football season, Ryan and I have decided to host a standing brunch for anyone who feels like swinging by. No RSVPs are required, which means we are trying out dishes that can scale from as a few as six people to as many as forty.

This is a cooking challenge I am SUPER excited for, as it stimulates the producer-ly planning part of my brain combined with the fun of binge cooking comfort food. The items have to be easy to make and ideally easily frozen if there is a small turnout. Above all, they should be crowd-pleasers.

...and what is a bigger crowd-pleaser than enormous, cheesy, Tater Tots?

Specifically, H-100s from Alhambra's heavy metal-themed burger joint, Grill 'Em All. These babies are packed full of garlic and cheese, then fried in a seasoned panko breading and served with a garlic aioli. For crying out loud. They also have burgers that will make your taste buds explode with pleasure, but that is a different story (:cough: Vampiro burg).


Now are you ready for information you can't un-learn?

Tater tots, including these suped-up heavy metal potato beasts, are totally simple to make at home. That's right, you could eat these every night. Every. Freaking. Night. (Disclaimer: You probably shouldn't do this.)

Not only are they delicious, but they are also a great item to cook at a party because, if you run late, you can have your friends help with the forming of the tots and/or breading.

So who wants to learn how to make some H-100's???

Sunday Brunch: H-100's (Tater Tots) with Garlic Aioli
Start with three large potatoes.

Sunday Brunch: H-100's (Tater Tots) with Garlic Aioli
Drop them into a pot of lukewarm water, and bring to a boil. Once boiling, cook for approximately 20 minutes, or until the potatoes easily split with a fork.

Sunday Brunch: H-100's (Tater Tots) with Garlic Aioli
While the potatoes cook, grate 1 cup sharp cheddar cheese and 1 cup pepper Jack cheese. Be sure to grate extra snacking cheese, if you are anything like me.


Sunday Brunch: H-100's (Tater Tots) with Garlic Aioli
Mince 8 cloves of garlic either by hand, or with your nifty garlic mincer. 5 cloves will be for the potatoes, and 2 for the aioli.

Sunday Brunch: H-100's (Tater Tots) with Garlic Aioli
Combine garlic and cheese in a bowl and set aside. Try not to eat.

Sunday Brunch: H-100's (Tater Tots) with Garlic Aioli
See this tater? It is fully cooked, as evidenced by the clean split.

Sunday Brunch: H-100's (Tater Tots) with Garlic Aioli
Let the potatoes cool and peel the skins.

Sunday Brunch: H-100's (Tater Tots) with Garlic Aioli
Grate the potatoes on the large side of a box grater.

Sunday Brunch: H-100's (Tater Tots) with Garlic Aioli
Combine with heavenly cheese mixture, and add salt and pepper to taste.

Sunday Brunch: H-100's (Tater Tots) with Garlic Aioli
Shape into cylinders, approximately an 1 1/2" high, and 1/2" wide. It should fit nicely into the palm of your blurry hand.

Sunday Brunch: H-100's (Tater Tots) with Garlic Aioli
Line up your little soldiers on baking sheet and pop into the fridge to chill. While chilling, start preparing the aioli.

Sunday Brunch: H-100's (Tater Tots) with Garlic Aioli
Add 2 coves of minced garlic, 1 cup mayonnaise, 2 tsp Dijon mustard, 2 tbsp apple cider vinegar and 1 tsp fennel seeds to a bowl. Add salt and pepper to taste.

Sunday Brunch: H-100's (Tater Tots) with Garlic Aioli
Whisk, baby, whisk.

Sunday Brunch: H-100's (Tater Tots) with Garlic Aioli
Once combined, pour into serving bowl and chill in refrigerator. Set out about fifteen minutes before you are ready to serve the H-100's so that it has time to reach room temperature.

Sunday Brunch: H-100's (Tater Tots) with Garlic Aioli
Back to the Tots. Set up a breading station comprised of flour, egg wash and breadcrumbs.

Sunday Brunch: H-100's (Tater Tots) with Garlic Aioli
The panko should look like this - heavily seasoned with paprika, salt and pepper.

Sunday Brunch: H-100's (Tater Tots) with Garlic Aioli
Remove your H-100's from the fridge and toss in flour. I find it helpful to do the flour in one batch...

Sunday Brunch: H-100's (Tater Tots) with Garlic Aioli
...and egg wash and breadcrumbs in a second batch. The latter is super gooey, so it helps keep things streamlined. This is a great time to have a friend step in and help you, if you are working on other dishes.

Sunday Brunch: H-100's (Tater Tots) with Garlic Aioli
Look at all the tasty seasonings on this - this is why seasoning the breadcrumbs is so deliciously important.

Sunday Brunch: H-100's (Tater Tots) with Garlic Aioli
Pour an inch of canola oil into a skillet (or other frying vessel) and heat over medium-high heat. When it is to temp (when water sizzles when sprinkled onto the surface), carefully drop in the H-100's with a spoon. Look at 'em bubble. 

Sunday Brunch: H-100's (Tater Tots) with Garlic Aioli
Check after about 40 seconds to see if the bottom is brown - it will happen quickly. Once golden, flip and let the other side cook.

Sunday Brunch: H-100's (Tater Tots) with Garlic Aioli
Remove from oil and set aside on either a cooling rack or a plate lined with a paper towel.

Place into your favorite serving dish, uncover the aioli and enjoy!

There you have it! What is your favorite potato side dish?

H-100's (Cheesy Tater Tots)

Adapted from Les Petites Gourmettes

Serves 6 with ample portions, 8 for moderate portions.

3 large potatoes (I used Russet)
5 cloves of garlic, minced (if making the Garlic Aioli, can mince all in one go)
1 cup sharp cheddar cheese, grated
1 cup pepper Jack cheese, grated
1 1/2 cups flour, for dredging
2 eggs plus 2 tbsp water, for dredging
2 cups panko breadcrumbs
1 tbsp smoked paprika
Salt
Pepper

Timing note: When making these, be sure to leave about 15 minutes for the potatoes to cool post-boiling. When you peel and grate them, you really don't want them to burn your hands. I learnt this the hard, impatient way.

Start by placing your potatoes in a pot and bringing them to a boil. Once at a rolling boil, cook for 20 minutes.

While the potatoes are cooking, grate your cheese using the large side of a box grater and mince your garlic. Toss into a big bowl and set aside.

After 20 minutes, pierce the potato with a fork - it should split the potato, or at least slide right in. You are checking to make sure it isn't hard and undercooked. Once cooked, set aside to cool.

[At this stage, it is handy to make the aioli. See below.]

Once your potatoes are cooled, peel the skins off and grate the potato using the same large side of a box grater. Add to bowl with the cheese and garlic, add salt and pepper to taste, and stir to combine. 

Use your hands to shape the potato mixture into Tater Tot-shaped balls, setting them down on a baking sheet once formed. Aim for about 1 1/2" high and 1/2" wide. Once they are all formed, place the baking sheet in the fridge for 20 minutes to chill and solidify slightly.

While chilling, prepare your dredging station with flour, egg wash and bread crumbs. For the egg wash, combine the eggs and water in a bowl and whisk heartily with a fork until smoothly blended. For the bread crumbs, combine the panko with paprika, as well as salt and pepper to taste. I love paprika, so I add an ample amount.

Place a cast iron skillet (or any frying vessel) over medium-high heat and fill with 1 inch of canola oil. The oil is ready to go if it sizzles when sprinkled with water. Remove the H-100's from refrigerator and gently lower 5-6 into the oil using a spoon. They will sizzle and quickly turn golden brown.

Check regularly and flip when the underside is brown, about 40 seconds. Flip and cook the other side, then remove and set aside on a cooling rack, or a plate lined with a paper towel. Continue until all tots are cooled.

Serve warm, and enjoy the heck out of them!

If Freezing: Let cool, and place into a freezer bag in one layer. To reheat, place in a 350° oven and cook for about 20 minutes, or until warmed through.

Garlic Aioli

Adapted from Les Petites Gourmettes

Note: The original recipe calls for malt vinegar and tarragon, which I am sure is lovely. I didn't have any around, so I adapted to the below.

2 cloves of garlic, minced
1 cup mayonnaise
2 tsp Dijon mustard
2 tbsp apple cider vinegar
1 tsp fennel seeds
Salt and pepper to taste

Add all ingredients to the bowl you wish to serve it in, and whisk. Allow to chill for at least 15 minutes. If your sauce seems too thick, whisk in 1/2 tsp more vinegar at a time until it reaches your desired consistency.

Wednesday, July 2, 2014

Take Your Food on a Day Trip: Recipes and Tips for the Perfect Picnic

Backyard picnics totally count. Dogs love 'em!

This blog post was inspired by a friend, the lovely Molly, who was on the hunt for a dish to bring to an Independence Day picnic. Really, is there anything more Americana than spreading out a tablecloth in a park and digging into a portable feast?

Sometimes, though, packing everything up and driving to a location outside of your living can seem like a ton of effort. The allure of the AC can easily tempt an otherwise avid picnicker away from their gingham. To help provide extra motivation to get out and about (myself included), I have organized some of my favorite picnic spots, menu-planning tips and recipes to make the prep minimal and the fun maximized.

Comments and other favorite recipes are very welcomed, so please comment below if there is anything you would like to add!

Destinations

The main ingredient in a good picnic is a scenic setting. Or wine. One or the other. In case you are looking for some fun places to take your outdoor feast, here are some places to try out.
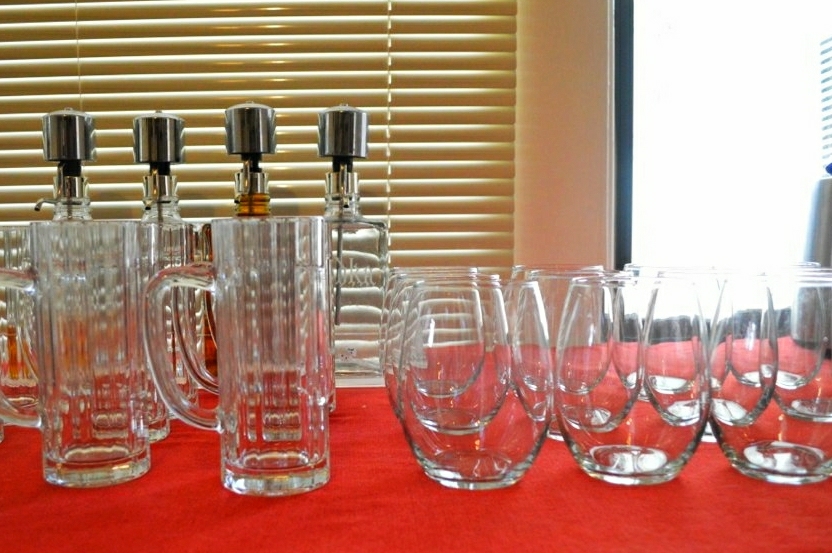


What Tools to Pack

After our wedding and the generous gifting of friends and family, I now actually have three beautiful picnic baskets in my possession. There is something impossibly charming about thick plastic, washable silverware and plaid napkins (not to mention straps to lock down your plastic wine glasses).

Of course, a picnic basket is not strictly necessary for a picnic. Heck, it can even be a hazard if you are attempting to picnic in Jellystone. Reusable shopping bags work just fine, preferably the insulated type to ensure food is kept fresh and at safe temperatures.

In addition to the transportation method, here are some good essentials to remember to bring while on a picnic:

  • Beverages and food (naturally)
  • Napkins
  • Utensils
  • Paper grocery bags for garbage and recycling
  • Tablecloth or blanket to sit on
  • A couple Ziploc bags for leftovers (e.g. chips you do not want to get stale in their torn bag)
  • Freezer packs to keep food safe and chilled
  • Sunblock
  • Hand sanitizer (if you are a big baby, as I am)

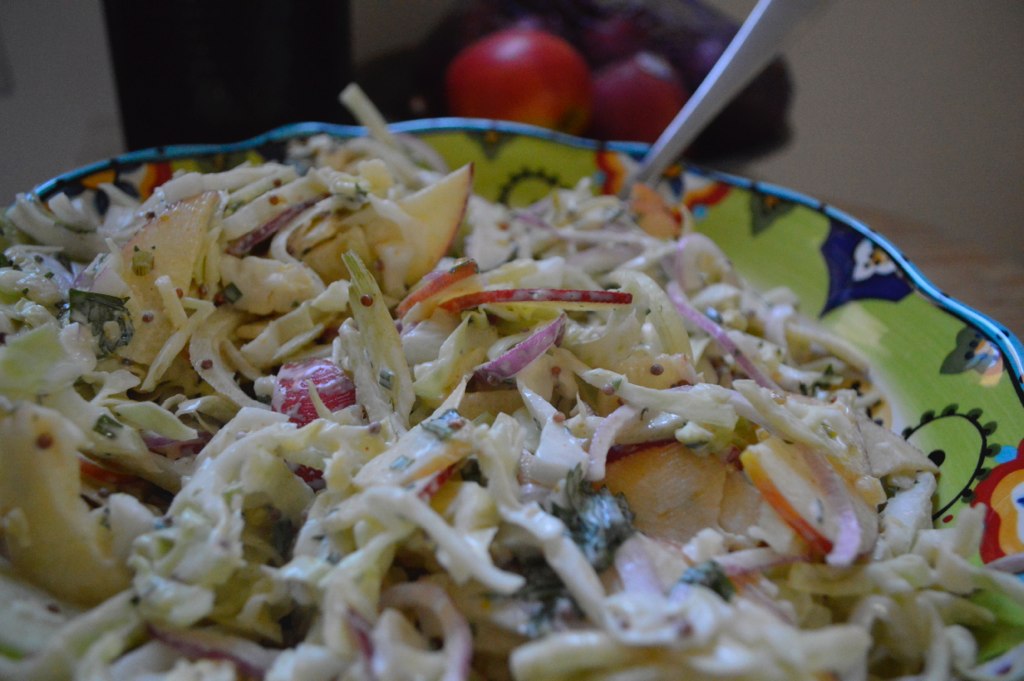
Corn Salad Al Fresco

A Menu Template for a Group of 6

For your picnic planning convenience, I have put together an outline of a sample spread that would feed a hungry group of 6. Note that I have Italian blood in my veins, so this errs on the side of more vs. less.

  • Water
  • Wine or other libation
  • 1 tub of store bought dip or spread (think hummus, bruschetta or that amazing Trader Joe's Spinach and Kale Greek Yogurt Dip)
  • 1-2 dip vehicles (any of the big C's - crackers/chips/crostini/crudites)
  • 1 type of sandwich
  • 1-2 bowls of vegetable-based salad
  • 1 bowl of pasta salad
  • 1 batch of your favorite cookie recipe, or store-bought package
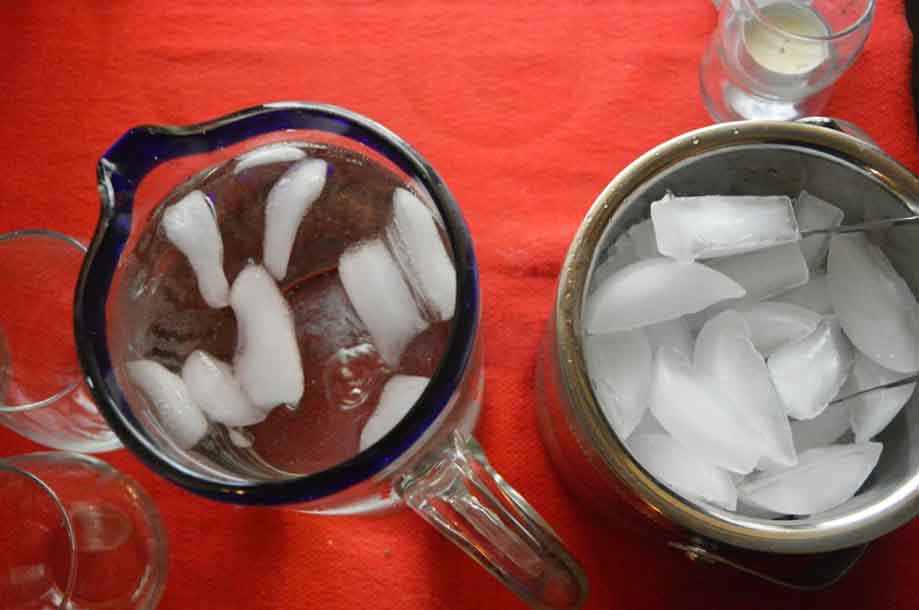
Water

Water bottles all the way! Make it easy on yourself and get a bunch of ready-to-go water or bring your own reusable bottles from home. Plan for at least two medium-sized bottles per person. It may be heavy to carry in depending on your ultimate destination, but better to have too much water on a hot day than not enough.

Wine of All Kinds

You know your friends and their drinking style (er, quantities), but I would plan for roughly 3-4 glasses per person depending on how long you are going to be out.

Wine is a natural picnic libation, although many parks will not allow you to bring in glass. Fortunately, despite the chagrin of high-end wine lovers, there has been a steady influx of boxed and pre-portioned wine meant for glass-free environments. I love a brand called Bandit Wines. This wine provides a great bang for your buck, and is even served at respectable eateries like Gott's Roadside in San Francisco (a fact that can be provided lest a friend tease your wine's boxed packaging). Bandit's Pinot Grigo is my choice for hot Summer days. Make sure you have it nice and chilled before you leave, and try to keep chilled in an insulated wine pouch.

If you are feeling extra festive, Pinterest is a treasure trove of great sangria recipes. One of my favorite boozy party tricks (that works perfectly fine at home, as well) is, if you want to keep a sangria cold for a long period of time, fill an ice cube tray the night before with the wine you are using for the sangria. The cubes won't freeze all the way, but will be just chilled enough to keep your beverage nice and cold without watering it down when the cubes melts.


A Classic Pesto Chicken Sandwich

Inspired by Fiore Market Cafe's Roast Chicken Sandwich

This sandwich is fantastic for an outing as it is fast to make, and very simple to scale either larger or smaller depending on how many people you want to make it for. It is tangy and refreshing. I don't recommend a portion of chicken per-sandwich as it all really depends on the size of your bread and your personal preference.

Serves 6

1 rotisserie chicken
1 small jar pesto sauce (or fresh, recipe I use to follow)
12 slices fresh bread, sliced sourdough or brioche ideal
Mayonnaise
Freshly ground pepper

Using two forks, tear the entire chicken into thick shreds and place into a bowl. Scoop enough pesto sauce into the chicken so that it fully coats each of the shreds.

Lay out the bread, and spread a light layer of mayonnaise onto each slice. Scoop chicken onto 6 slices of bread, and grind some pepper onto it. Top with other piece of bread. You may have chicken leftover (but is that really such a bad thing)?

Wrap tightly in butcher paper or foil. 


Fresh Pesto Sauce

2 cups fresh basil leaves
1/2 cup walnuts, chopped
1/2 cup Parmesan cheese, freshly grated
2 cloves garlic, minced
3/4 cup olive oil
Salt
Pepper

Place the basil in a food processor and pulse slightly. Add the walnuts and pulse several times until broken into small bits. (Note: This is why it helps to prep the walnuts, Parmesan and garlic earlier, so that you don't have to pulverize the basil to break down the other ingredients.)

Add the cheese and garlic, and pulse until all broken down to your desired consistency. If you have the option with your food processor, drizzle the olive oil in slowly while you pulse so it all purees correctly. My food processor does not present this option, so I just add a little at a time until it has the desired consistency. It may not include the entire 3/4 cup olive oil if done this way. Salt and pepper to taste.


Ryan's Simple Corn Salad

My hubby likes to cook, and I happily get to benefit. He whipped this up last week based on other corn salads that we have enjoyed previously. You can substitute with whatever you have on hand, such as shallots or yellow onion for red onion, arugula for cilantro, etc.

Serves 6

4 ears of corn
1 tbsp butter, softened
2 small red onions, thinly sliced (a mandolin slicer comes in handy here, if you have one)
5 tbsp cilantro, trimmed from the stem
2 tbsp white wine vinegar
Salt
Pepper

Rub the butter on the corn, and then grill the corn on a very hot grill pan or barbecue. Once tender to the touch, remove and let cool a bit. Using a sharp kitchen knife, hold the ear vertically and cut down (away from you) so that the full kernels of corn come off. Transfer to a bowl.

Toss corn with thinly sliced red onion and the cilantro. Add vinegar and salt and pepper to taste.

Heirloom Tomato, Crushed Basil, Fleur de Sel Salad

taken directly from The Lemonade Cookbook by Alan Jackson and Joann Cianciulli

This tomato salad is very bright and satisfying, from a cookbook filled with recipes that embody all things bright and satisfying. For those who live in LA, you may be familiar with the Lemonade restaurants' fresh fare. This cookbook is a good investment for those interested cold salads and unique vegetable side dishes.

If making the pesto sauce earlier in this post, you may have a good amount of basil left over for the vinaigrette. Alternatively, if you like, you can make more of the pesto and just toss that instead of the Vinaigrette

Serves 8 (Yields About 4 Cups)

1 1/2 pounds assorted ripe heirloom tomatoes such as brandywine, sungold, and red beefsteak
1/2 cup Basil Vinaigrette (recipe follows)
1/2 cup fresh basil leaves, hand torn
1/4 tsp freshly ground black pepper
1 tsp fleur de sel

Cut the bigger tomatoes into 1/4-inch-thick slices and quarter or halve the smaller ones; this vegetable salad looks great with different colored tomatoes of varying sizes and shapes. Put the tomatoes in a mixing bowl and pour in the vinaigrette. Toss gently, taking care not to smash the tomatoes. Sprinkle in the basil leaves. Season with pepper, and toss again to combine. When ready to serve, sprinkle with fleur de sel. Serve at room temperature.


Basil Vinaigrette

taken directly from The Lemonade Cookbook by Alan Jackson and Joann Cianciulli

Yields 1 cup

1 1/2 cups fresh basil leaves, coarsely chopped
1/4 cup fresh flat-leaf parsley, coarsely chopped
Juice of 1/2 lemon
3/4 cup canola oil
1 tsp coarse salt
1/2 tsp fresh ground black pepper

In a blender, combine the basil, parsley, lemon juice, oil, salt and pepper. Blend on high speed for about 1 minute until smooth and green. Pour the vinaigrette into a container and keep any leftover covered in the refrigerator for up to 5 days.


Lemon Orzo Salad with Asparagus and Tomatoes

taken directly from Honeybee Gardens

This recipe is really simple to make, and a go-to picnic favorite for us. It is bright and fresh-tasting, and by far one of the healthier options for a pasta salad. Please click through to the above link to check out the other great recipes and picnic tips!

12 oz. orzo
1 bunch fresh asparagus, cut into 1-inch pieces
1 pint grape or cherry tomatoes, halved
1 lemon, zested and juiced
4 Tbs. extra virgin olive oil
1 clove garlic, minced
2 Tbs. fresh parsley, minced
Kosher salt
Fresh ground pepper
Grated Parmigiano Reggiano

Bring 2 large pots of water to boil. Add a big pinch of salt in each. To one pot, add asparagus and blanch, about 2 to 3 minutes, depending on the thickness of your asparagus. Place blanched asparagus in a bowl of ice water to stop the cooking and keep them green. To the second pot, add the orzo. Cook per package instructions. When tender, drain and place in a large bowl. Add blanched asparagus and tomato halves. Mix olive oil, lemon zest, lemon juice, garlic, salt and pepper in a small bowl. Stir into orzo and vegetables. Stir in parsley and grated Parmigiano Reggiano. This can be served warm, room temperature or cold.

Saturday, June 28, 2014

How to Host a Casual Summer Barbecue

Who wouldn't want a plate of that?

Recently, we decided to have a handful of friends over for some barbecue and an easy hangout. As it is, in fact, a million degrees outside, the goal was to put together a menu that would not require slaving away in a hot kitchen all day. Being an advocate of simple, casual get-togethers, I have detailed some tips and tricks for throwing the perfect casual gathering.

Have Glasses at the Ready

"Fill us!"

One aspect of our style of entertaining is... it includes a lot of beverages. This typically includes sharing beer tastes (we run with a craft beer-loving crowd), wine and/or a cocktail that can be made in large batches. Also, copious amounts of water. More on that momentarily.

This little sideboard is actually a makeshift piece of party furniture. Spoilers: it is an old Ikea media console covered in a cute red tablecloth. It came out for a dinner party, and has been so useful that it lives in our dining room until we find a 'real' sideboard alternative. It is convenient to have something set aside purely for a party, on which you can set food, drink or, in this case, glasses, without crowding up your dining room or coffee table.

The glasses are ones I got in bulk. The steins are from a family friend and have a flat side where guests can write their names with whiteboard markers (if you aren't too lazy to find a whiteboard marker, as we often are). The stemless wine glasses are perhaps my favorite entertaining coup, being $1 each from Dollar Tree. Having these out and ready for self-service really opens up your time.

Pitchers of Beverages


Ice, ice, baby.

First, the water. I like to make sure that there is always a pitcher of water filled, namely because of the aforementioned Summer heat.

This party marked the first appearance of the ice bucket, which turned out to be quite useful. I was really impressed with how long the ice stayed solid in there, and only had to be refilled once. This was a cheap find at TJ Maxx that my mom gifted us, and likely won't run you more than $10 or $15. Periodically, I would refill the water pitcher and add more of the ice cubes to make sure it stayed chilled.

Imagination exercise: picture a pitcher filled with lemonade above, as if I had remembered to take a photograph of it. This mythical pitcher was filled with mint lemonade I had made that morning. The base recipe is quite easy, and I simply muddled some mint and tossed it into the lemonade to chill a couple hours and add a minty flavor. This served double-duty as a non-alcoholic option, as well as a cocktail alternative to beer. By putting out some vodka and bourbon, this gave guests the option to spike lemonade if they felt so inclined.

Table Setting


Placemats and all!

Typically, I like to use real plates and some inexpensive, bulk black cloth napkins I bought on Amazon, but this is barbecue. The day before, I went through over ten paper towels eating half a pulled pork sandwich. Let's be real, paper towels are the way to go.

Also, while I don't follow the classic "every party needs a flower arrangement!!" rule of thumb, I do think they are nice and pretty if you feel like indulging. We just snipped some roses from our yard and put them in this vase for some color.


Oh, fork it. Let's just eat.

I believe that barbecue also calls for paper plates, roughly three per person if you want to factor in the inevitable repeat visits to the food. Costco almost always has some variation of a hearty, holiday-themed individual-sized paper platter. Being a few weeks away from the 4th of July, an American flag design it is. Paired with the barbecue, let's just say it added an air of patriotism to the occasion.

The silverware I tossed in a wide-mouthed mason jar glass so people can grab them easily.

The Menu


"I want to eat the meat!"

The food was all about comfort food. No, we didn't eat the dog (as the photo above might suggest). Our good friends Christie and Adam (purveyors of all things delicious) introduced us to Bludso's BBQ, a delicious little hole-in-the-wall in the heart of Compton. We picked up an obscene amount of meat and planned to make the sides ourselves, excepting the big batch of beans the same two friends brought us from Gus's Barbecue (aka: the South Pasadena rival of Bludso's for our meat-loving hearts).

Sides included...

The Dudes' Apple Fennel Slaw

So fresh and so clean.

As I have previously mentioned, the Two Dudes, One Pan cookbook is one of my absolute favorites. Their recipes are simple, foolproof and unique. Their Apple Fennel Slaw recipe is utterly divine. We omitted the jalapenos this time as we wanted it to cool down the meat, but typically we like it nice and spicy.

Pioneer Woman's Macaroni and Cheese

Artery clogging goodness.

I highly recommend Ree Drummond's recipe for some down home, cheesy comfort.

Word to the wise, the six servings she mentions are HEARTY six servings. This made an enormous pot of mac and cheese, which we proceeded to graze on for hours.

Pecan Bars

I chose this recipe because each step of it included bourbon and, well, that is pretty awesome. Admittedly it didn't yield pecan bars as flavorful as I like them to be, but a sprinkle of brown sugar or sea salt perked those right up.

The Timeline

For those curious, here is the timeline I followed to keep things organized and low-stress:

Day Before
  • Pick up BBQ
  • Make slaw (better if sits, anyway)
  • Run glassware through the dishwasher and set out
  • Top off decanters with vodka and bourbon for spiked lemonade

Four Hours Before Guests Arrive
  • Set the table
  • Snip flowers (if using)
  • Make pecan bars (although easily could be made the day before)

Two Hours Before Guests Arrive
    • Heat BBQ on low, 230*
    • Get beverages ready and put in fridge to chill

    Forty Five - Thirty Minutes Before Guests Arrive
      • Set out ice bucket and beverages (make sure the beverages are filled with an adequate amount of ice so they stay chilled)
      • Make mac and cheese and keep warm on low

      ...and there you have it! What are your secrets for a quick-and-easy Summer party?!

      Thursday, June 12, 2014

      The Dudes' Ceviche - A Perfect Summer Treat


      Once upon a time, I was very intimidated by ceviche. For those unfamiliar, ceviche is a dish comprised of small pieces of raw fish, 'cooked' in citrus juices and seasoned with peppers, cilantro, or a plethora of other options.

      The 'cooking' in citrus juice factor is what daunted me the most. Sure, science and every other place that serves ceviche says that it is cooked, but what if I poison my friends by accidentally serving raw fish that isn't sushi-grade? Well, that was until I went to Mexico on my honeymoon and was positively spoiled by the delicious ceviche made available. Upon arriving home, I wanted more. ASAP.

      Fortunately, Vinny Dotolo and Jon Shook (prolific restaurateurs in Los Angeles) have the best cookbook on our shelves (heck, probably anyone's shelves) that includes a delicious recipe. This book is Two Dudes, One Pan: Maximum Flavor from a Minimalist Kitchen, and you should open a new tab and buy it immediately. Really. I'll wait.

      OK, welcome back! You won't regret it. Back to my initial ceviche-at-home aversion. In essence, I just make sure to get good quality fish from the fancy grocery store (Bristol Farms, in our case) for my peace of mind. Don't get the manager's special 'probably still good' fish for this one.

      Prepped and ready to set in the fridge.

      This dish also feels very decadent, while really being extremely simple. The hardest part is making sure to plan an hour to several hours ahead, so the fish has time to marinate. In the times I have made this, we have typically had leftovers. The next day was often even better than the first. Sure, I wouldn't push it any more than 24 hours for aforementioned paranoid reasons, but, until then, you can get your hands on some damn fine ceviche.

      Served with tortilla chips, this also makes an excellent appetizer for a party. It is fresh-tasting, bright with the citrus and peppers and stretches amongst a large group of people as folks are far less likely to destroy a dish of fish than, let's say, shoveling in hummus.

      Ready to serve!

      Peruvian-Style Citrus Ceviche

      from Two Dudes, One Pan: Maximum Flavor from a Minimalist Kitchen by Jon Shook and Vinny Dotolo

      Serves 4 to 6

      Substitutions and Adjustments: This recipe calls for fluke, group, or halibut but, considering our fancy grocery store didn't have fluke or group and halibut was $33 a pound (a little rich for my blood), the fishmonger suggested tilapia. This came in at about $13 a pound, and turned out great. This can also stretch to feed about 8, if served as an appetizer. Finally, I substituted tortilla chips for popcorn or corn nuts.

      1/4 cup fresh lemon juice (from about 1 lemon)
      1/4 cup fresh lime juice (from about 2 limes)
      1/4 cup fresh orange juice (from about 1/2 orange)
      1 jalapeño or serrano chile (seeded and deveined for less heat), finely diced
      1 tablespoon finely diced red bell papper
      1 tablespoon finely diced yellow bell pepper
      1 tablespoon chopped fresh cilantro
      2 teaspoons sugar
      1 1/2 teaspoons kosher salt
      2 8-ounce skinless fluke, grouper, or halibut fillets, cut into 3/4-inch cubes [NH: I used tilapia]
      Popcorn or corn nuts for serving (optional) [NH: I served with tortilla chips]

      Whisk the lemon, lime, and orange juices together in a large bowl.  Add the jalapeño, bell peppers, cilantro, sugar, and salt and whisk to combine.  Add the fish and toss gently with your hands.  Cover the bowl with plastic wrap and marinate in the refrigerator for 1 to 2 hours. Serve in bowls with popcorn or corn nuts on the side.

      Tuesday, June 3, 2014

      A Quick-and-Easy Italian Quesa-pizza

      Adding arugula on top essentially makes it a salad.
      Open-faced quesadilla?
      Tortilla pizza?

      Let's just go with "Quesa-pizza."

      I had a friend swing by randomly the other day, and I had nothing to eat. Well, nothing that wasn't part of my Freezer Binge Cooking Day.

      So, if you are looking for a quick-and-easy snack for your impromptu guests that isn't tortilla chips and old salsa, I recommend this quick fix. It has the casual, cheese-laden hint of college "cooking" that pairs nicely with daytime beer.

      Plus, isn't anything made better when you sassily turn it into a pizza? In the past we've put palak paneer on a pizza and broiled it so it got nice and melty (palak paneerza, anyone?). We also cooked up some Trader Joe's marinated Bool Kogi and put that on a pizza along with mozzarella and kimchi. Fusion is so hip right now.

      This time, as I had some leftover "Italian" ingredients, I went for favorite pizza toppings on my lazy woman's pizza crust (:cough: tortilla).

      Italian Quesa-pizza

      Serves 2, 1 tortilla per serving

      2 tortillas
      2 fistfuls shredded cheese (whatever is on-hand - I used shredded Italian blend)
      2/3 cup mushrooms, sliced thinly
      1/2 cup sun-dried tomatoes
      Butter
      2 cups arugula
      Lemon juice, to taste
      Olive oil
      Red pepper flakes
      Salt
      Pepper

      Start by laying out your tortillas on your work surface and sprinkling each with almost half of the cheese. Set a little cheese aside for later, about a couple tablespoons. Spread half of the mushrooms, then sprinkle half of the sun-dired tomatoes across each. Sprinkle the small amount of cheese you set aside on top. No practical purpose for this, just that cheese on top looks more alluring.

      Heat a griddle up over medium-high heat and rub a small pad of butter over it. Put the pre-assembled tortillas on the griddle until the cheese on the tortilla starts to melt. If you are overly hungry, as in my case, cover with a pot lid for a melting catalyst. This also works if you don't have a griddle, just heat up two skillets.

      Once the cheese melts, place on the plate you are going to serve on. Cut into desired segments. Use your high school geometry here, as I am pretty sure this is the only context in which I have. Place a heaping cup of arugula in the middle and add lemon juice, olive oil, red pepper flakes, salt and pepper on top of the arugula to taste.


      Viola! What is your favorite quick-fix snack?

      Tuesday, May 20, 2014

      Freezer Binge Cooking - Day 2 (and 3 and 4)

      The cooking day hath been completed, and several tasty meals have been born! Specifically, 45 individual servings of easy weeknight goodness.

      For those of you who missed my first post (and its nerd-tastic planning), you can check it out here. This post is going to more 'memoir' than didactic, and I recommend checking out the recipes themselves for more of a detailed breakdown. It also may have morphed into three extra days of cooking, not because of difficulty but primarily because I am easily distracted.

      One detail I was arguably way TOO excited about was the fact that I was able to procure some restaurant-style takeout containers in which to store two portions each. These babies are courtesy of Amazon, which was very handy for stacking (read: stuffing) our new food in our already-packed freezer. Hey man, four half-used bags of frozen peas take up space!

      Ooooh, sexy containers. You headin' my way?
      But what went in those containers, you ask? Oh I will tell you.

      The very first step on the cooking day was actually remembering to take out the spinach for the lasagna I was going to make that afternoon, which has to be fully thawed. Thank you, planning notebook!

      When it came time to begin the real cooking, the chili was first up. This is Pioneer Woman's "Simple Hearty White Chili," which cooks on the stove for several hours. I prepped the necessary produce for the recipe, and let it cook on the stove so I could move on to prepping the rest of the produce needed for the day.

      On to Martha Stewart's Primavera Lasagna. Oh this lasagna is good. I started by making the creamy sauce (made with whole milk instead of cream so, you know, zero calories), then added the vegetables and let it all cook together while prepping the other lasagna components. Mainly cheese. If making at home, be sure to prep an extra cup of grated cheese or so for snacking, otherwise the lasagna won't turn out right.

      Once prepped, the lasagna is layered and put in the oven. Here is the final product, pre-freezer:

      Lasagna Primavera and White Chili. So so good...
      Lasgana money shot.

      Having pre-shredded all of the produce for Smitten Kitchen's Stuffed Cabbage, I cooked up the parsnip, carrot and celery and set aside to cool.

      ...then I realized I was running super late for my friend's amazing Crawfish Boil and decided to make the rest of the stuffed cabbage the next morning. Which, thankfully, worked out very well! This is a great place to stop if you have to dash out.

      The next morning, full of crawfish, I picked back up and finished the filling, prepped the cabbage leaves, and assembled the rolls, letting them stew in tomato sauce.

      Tomato-y goodness.

      Turns out, doubling the recipe makes a LOT of stuffed cabbage, which I conveniently forgot from the last time I made this recipe. I'm talking 16 servings.

      Ready to freeze.
      As the cabbage cooled, it took no time to throw together the Black Eyed Peas in a Spicy Goan Curry. I immediately spooned small servings into freezer bags and stacked them so they could be frozen as sleek, thin rectangles.

      Yes. I made a bit of a mess  by the time it was all done.

      Cleaning service, anyone?

      The one straggler that made its way to Monday was the Curry Chickpeas with Dill, out of sheer laziness. However, making a double batch on Monday yielded two dinner servings and three hearty lunch servings, so it was all worth it. It really does make an excellent lunch. No photos. Too hungry.

      So.... there it is! A fantastic binge freezer cooking weekend (+Monday). All things considered, it really didn't take me long at all for the amount of meals that we have. It is also much cheaper to buy everything at once and prep in bulk. Highly recommended! We are reaping the bounty tonight and having a much more leisurely evening, no cooking required.

      What are your favorite freezable recipes?